Integrate Crypto Payments to Xero Invoicing: A Step-by-Step Guide
May 29, 2024

If you’re looking to add cryptocurrency payments to your Xero invoices, EukaPay is a great option. This tutorial provides a step-by-step guide to adding EukaPay as a payment service in Xero, allowing your clients to pay with crypto.
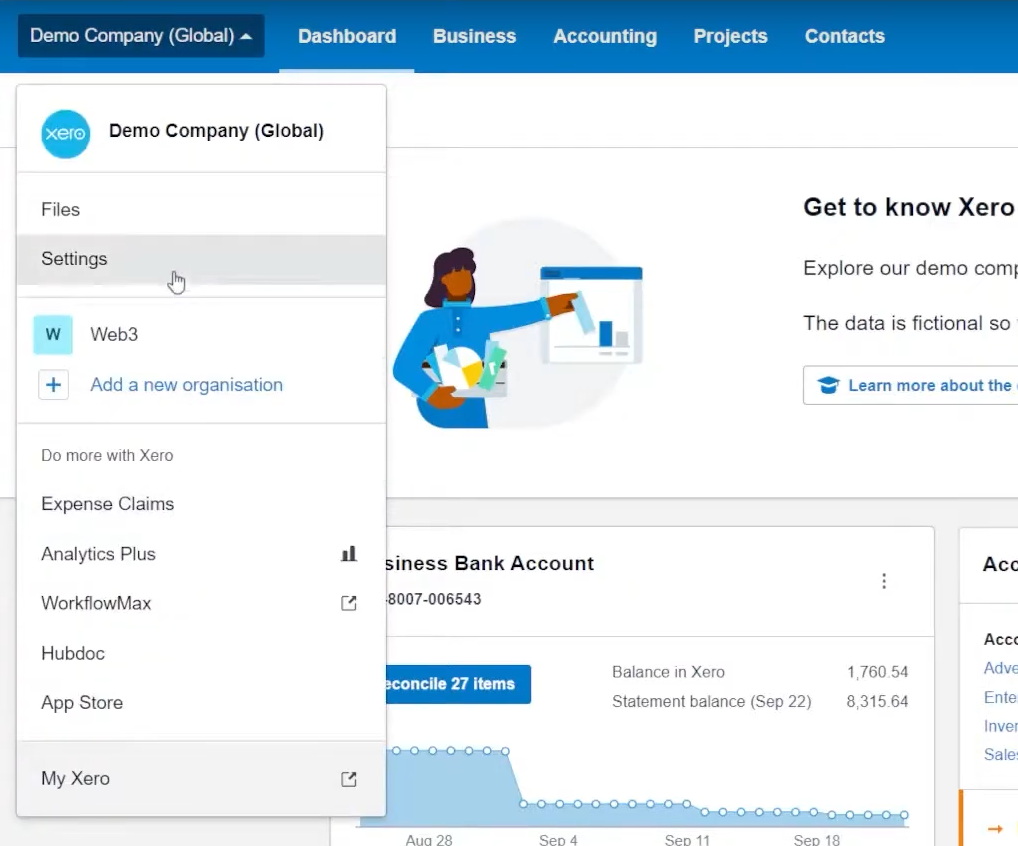
Step 1: Access Xero’s Settings
Start by navigating to the Xero dashboard. In the top-left corner, click on your company profile, then select “Settings.”
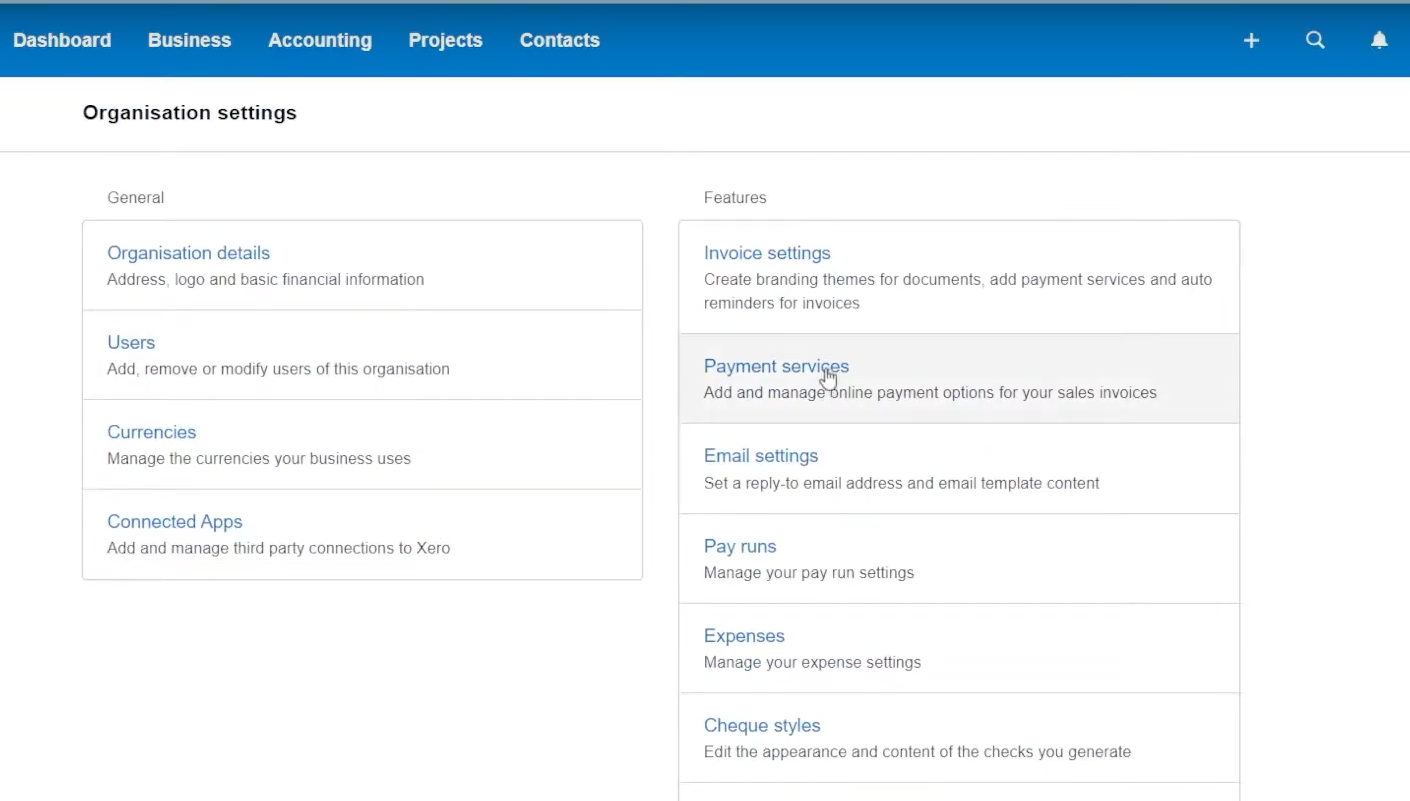
Step 2: Open Payment Services
In the Settings window, look to the right column and select “Payment Services.”
Step 3: Add EukaPay as a Custom Payment URL
Scroll down to the “Additional Payment Services” section. Click “Add Other” and then choose “Custom Payment URL.”

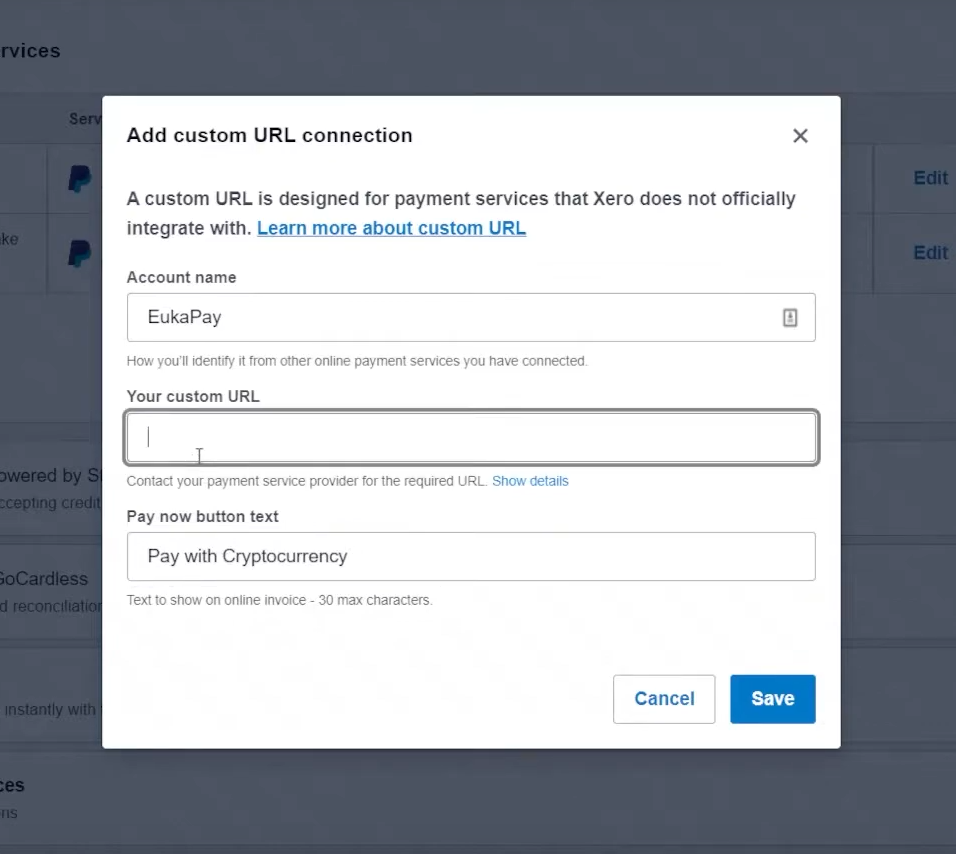
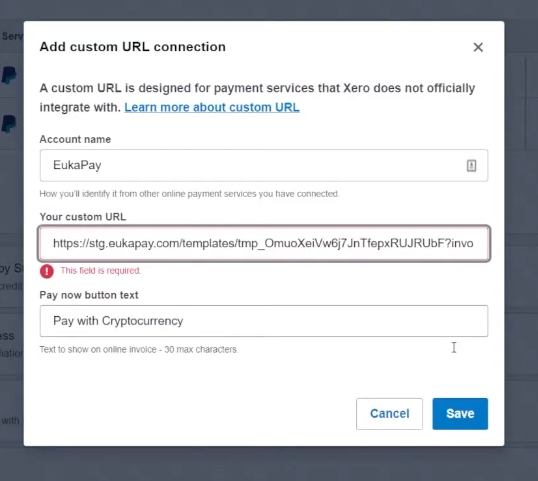
Step 4: Enter Custom Payment URL Information
In the Custom Payment URL form, enter the following details:
Account Name:
“EukaPay”
Pay Now Button Text:
“Pay with Crypto”
Now, you need to generate the custom URL from EukaPay to complete this step.
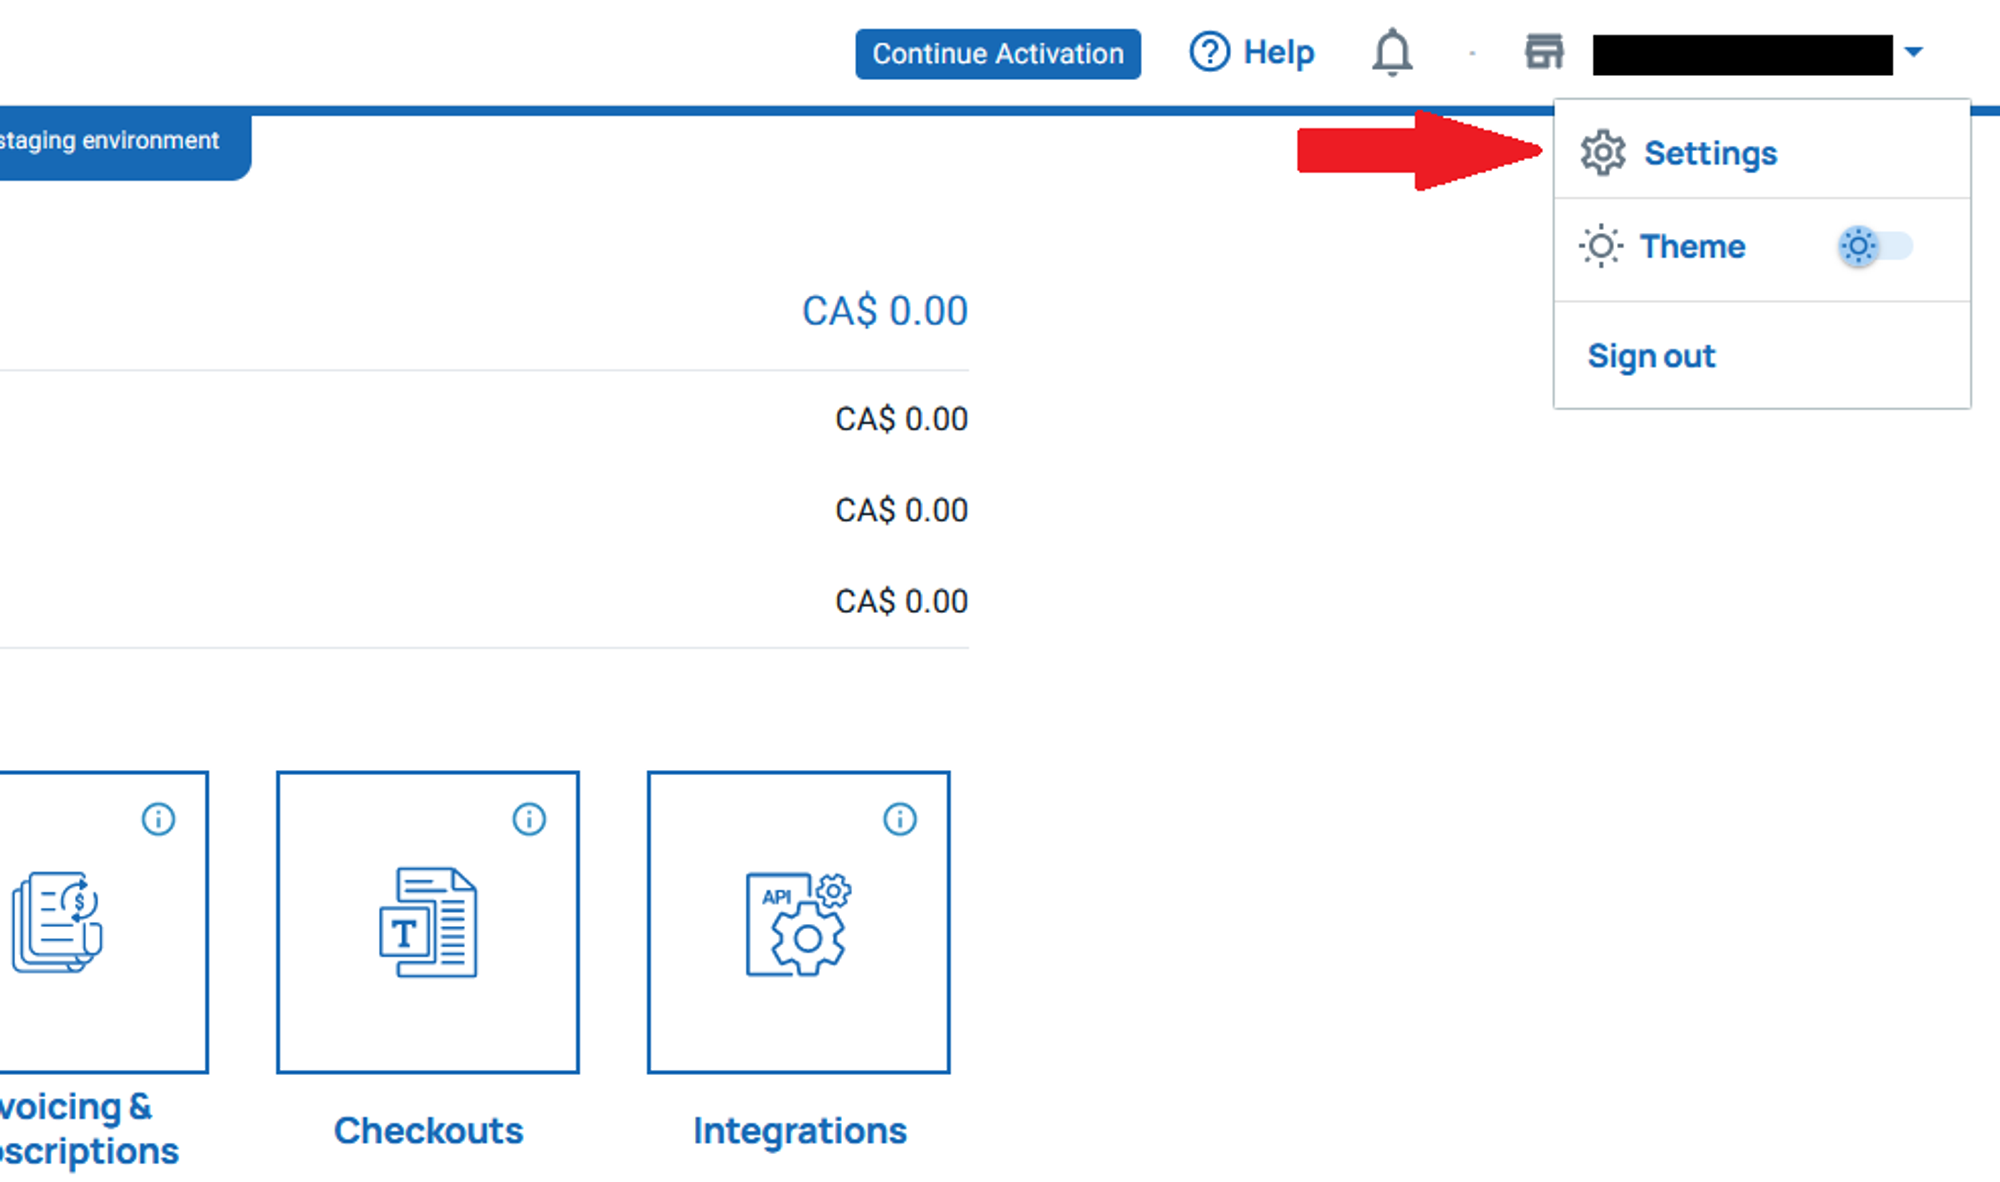
Step 5: Get Your Custom Payment URL from EukaPay
Log in to your EukaPay Business Account. In the top-right corner, click on “Settings.”
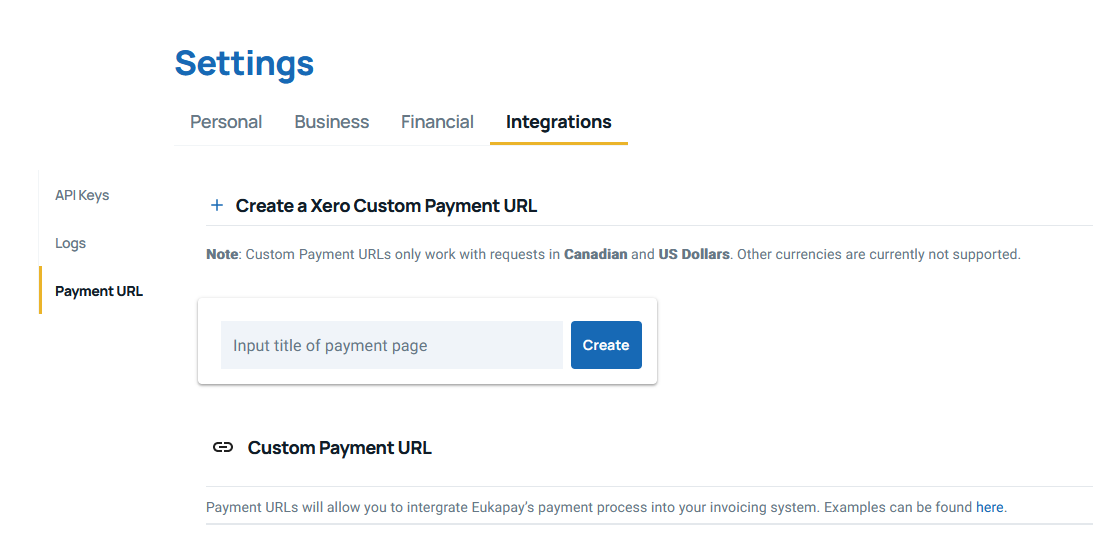
In the Settings screen, navigate to the “Integrations” tab and select “Payment URL.”
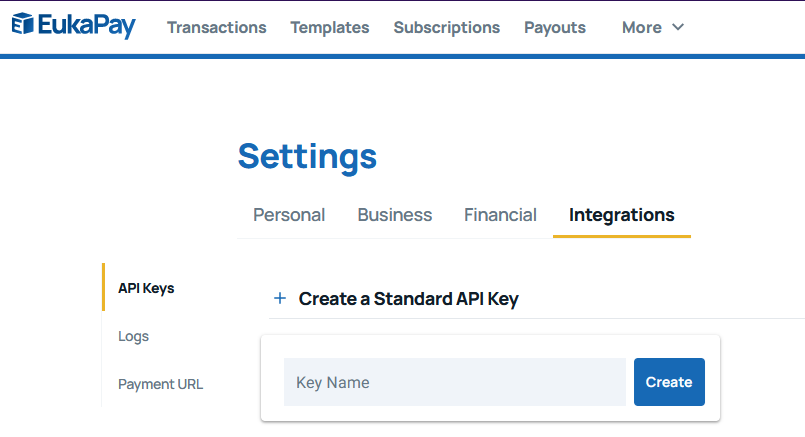
Under “Create a Xero Custom Payment URL,” enter an appropriate title for your payment URL. Then click “Create.”
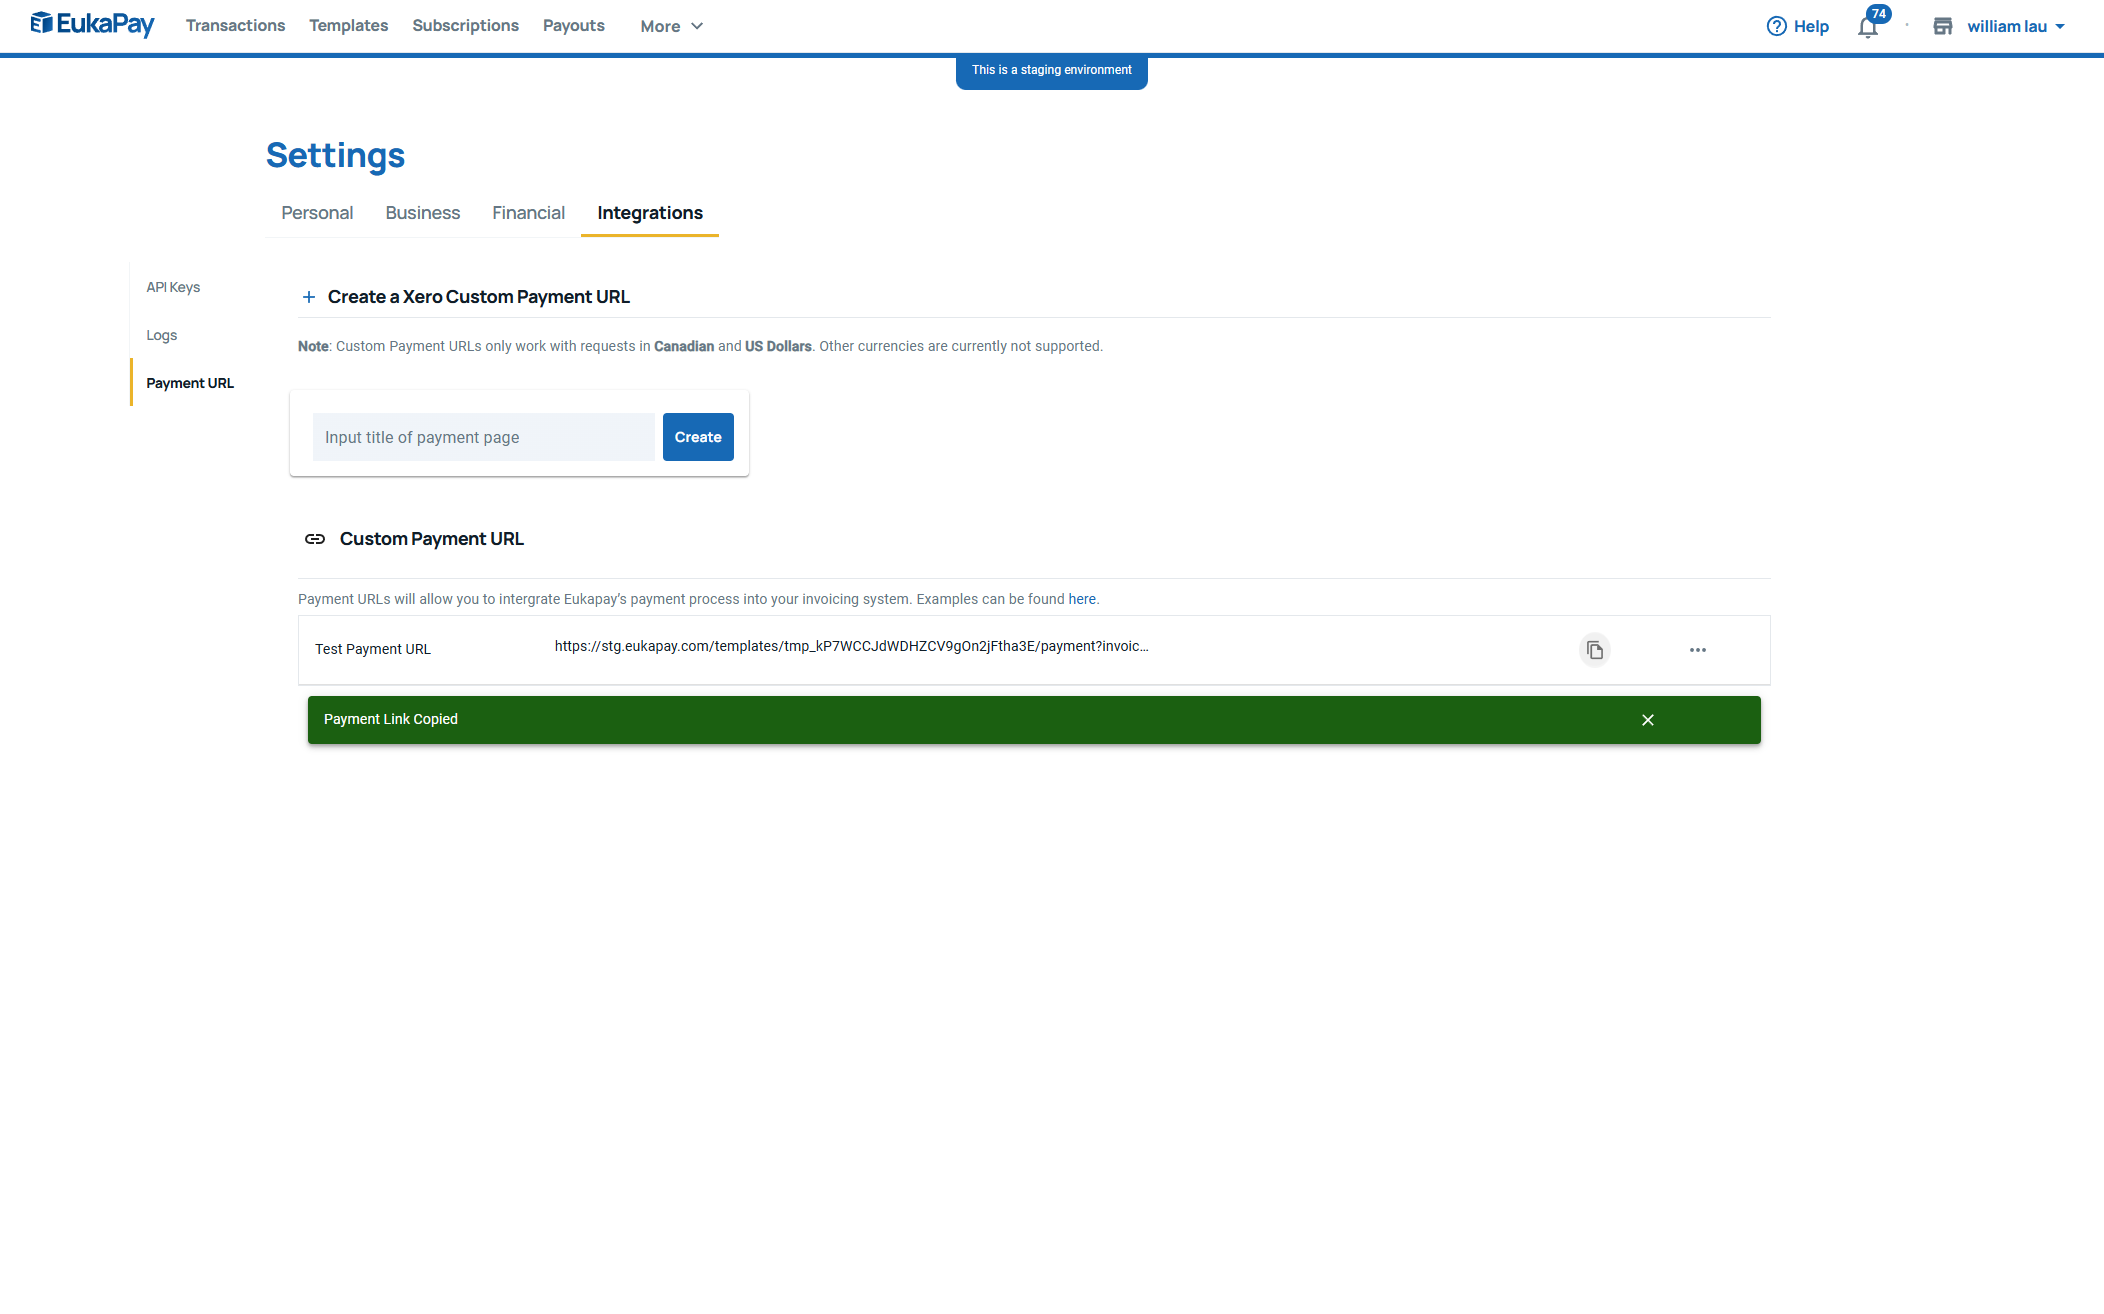
Scroll down to the “Custom Payment URL” section, then copy the link provided.
Step 6: Add the Custom Payment URL to Xero
Paste the payment link into the Custom Payment URL form in Xero, then click “Save.”
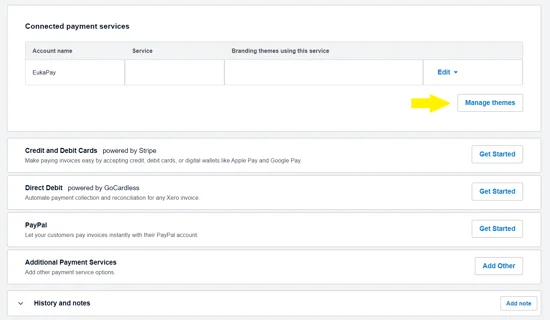
Step 7: Set Up the “Pay with Cryptocurrency” Button
To add the “Pay with Cryptocurrency” button to your invoices, do the following:
Under “Connected Payment Services,” click on “Manage Themes.”
In the window that opens, select “EukaPay” from the dropdown in the Credit Card column.
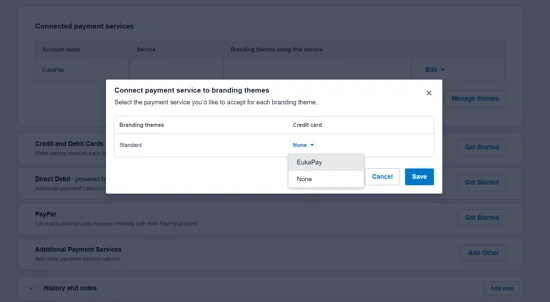
Click “Save.”
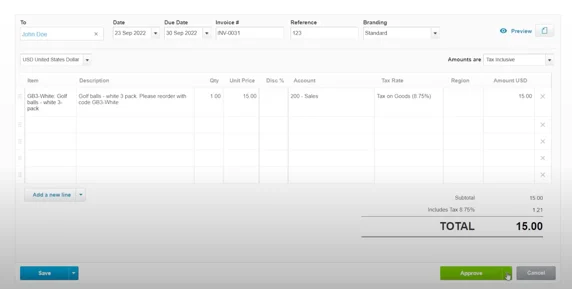
Step 8: Create and Send an Invoice
With EukaPay now integrated into Xero, you can create and send invoices with crypto payment options. To do this:
Click the “Business” tab (top-left corner).
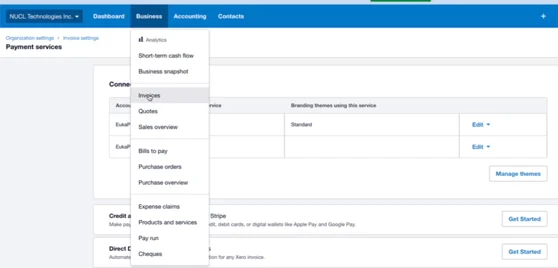
Select “Invoices.”
Click “New Invoice.”
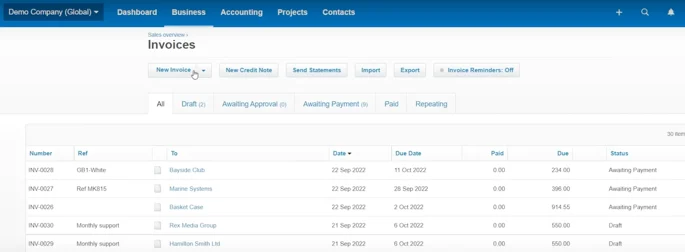
Enter the details for your invoice, then click “Approve.”
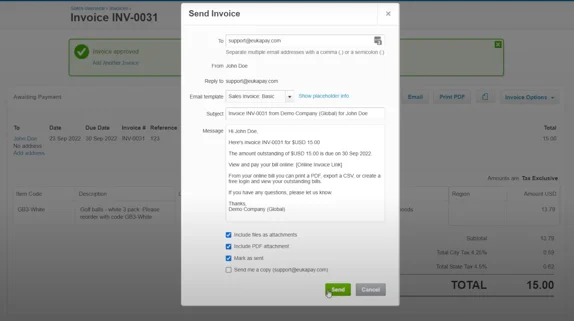
Next, click “Email” and then “Send” to deliver the invoice to your client’s email.
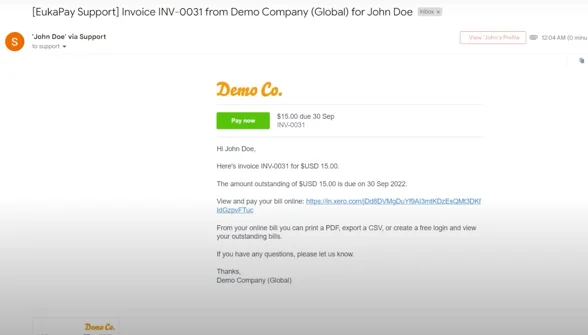
Step 9: Client Payment Process
Your client will receive the email with the invoice. They can click the “Pay Now” button to open the Xero payment window. From there, they can click “Pay with Cryptocurrency” to make the payment with digital currency.

Following these steps, you can integrate EukaPay with Xero to offer your clients a seamless way to pay invoices with cryptocurrency. This integration opens new possibilities for businesses and clients to transact using digital currencies.
Products
Use Cases
© 2026 EukaPay. All rights reserved.
FINTRAC: M22233887